Tuesday, April 21, 2015

Gina's Designs DT Tutorial - Should I Gesso?

Hello fellow chipboard lovers! I know many times you have read on this blog that I started my project out by using gesso. Gesso (which is pounced jesso) is primer. It gives your paint or glue something to hang onto as well as giving a tone that will allow the true color of your paint to be seen. 
In the picture below, the vintage lady on the right is how Gina's Designs chipboard will look when you receive your order. The lovely lady on the left has a coat of gesso applied to her.
 The ladies from above have invited a few of their friends to help show the effects of using gesso on Gina's chipboard pieces.
 
 First up are the sprayed ladies! I used the same amount and the same color of Lindy's spray on them, but the outcome was very different. The lady on the right has the gesso applied to her.
Next we have the painted stripe girls. I hope you are able to tell from the picture the differences. Starting from the top, I used a heavy body paint (Titanium White) and you can see the head on the left still is showing some of the brown undertone from the chipboard. The next three colors are your basic acrylic paint. You can tell the yellow and pink on the left have soaked into the chipboard. Since the lady on the right had a layer of gesso first applied, the brightness of the colors can be seen. While it is true the black paint looks good on either piece, my preference is to still gesso!
I embossed both sets of wings from the Dressforms and Wings Shape Set and a key plate for a project I am working on. I used gesso on the bottom piece, but not on the top nor on the key plate.  You can definitely see the difference! 
 Here is another shot of them on a different background. The wings on the right has gesso applied to it.
Again, the same amount and the same color of embossing powder was used on the items.

Gesso is available at art supply stores as well as your big box craft stores. There are so many brands of gesso out there for you to chose from. My recommendation, start with a small, cheap jar and experiment!  If you are looking for that true color, use gesso. If you don't want to give your pieces several coats of paint, use gesso. Looking for the darker color to come through like the embossed pieces above? No gesso!

So it is up to you, to gesso or not to gesso....only you can answer that question!

If you do have questions, please feel free to leave them in the comment section!

Gina's Designs Products Used:

Other Products Used:.
Lindy's Stamp Gang Embossing Powder - Magic Moon Pearls
Hampton Art Stamps Embossing Stamp Pad - Emboss!
Studio 71 - Gesso
Lindy's Stamp Gang Starburst Spray - Blue Hawaiian Blue
Americana Paint - Lamp Black & Poodleskirt Pink
Liquitex Heavy Body Paint - Titanium White
FolkArt Paint - Daffodil Yellow


Tuesday, March 31, 2015

Gina's Designs DT Project - Art Journal Page

 WOW! March 31. Where did this month go? I hope this post finds you all well and ready for some wonderful spring (or fall for some of you) days! I know I am ready for windows to be open. Today I have another art journal page. Yes, I do believe these are my new addiction. I call this one "Bloom Where You R Planted."
For this one I took a couple of sheets out of a large dictionary that was going to hit the trash.  I cut the pages into strips of different sizes and adhered them to the page with a glue/water mix. Gesso was lightly brushed over the top and allowed to dry before I played around with watercolors. The Prima doll was stamped directly to the page and was colored in with watercolor crayons, paint and marker. Instead of legs, I gave her a stem.
The dragonflies were embossed with Orbit Olive Gold. I used a combination of paint, ink and marker on the flowers and planter. The letters were put on white card stock and I used ink and chalk to define them. 

Gina's Designs Items Used

Other Items Used:
Gesso
Page from a dictionary
Watered down Glue
Crayola watercolor paints
Stampin' Up watercolor crayons
Distress Inks: Bundled Sage, Broken China, Milled Lavender
Alpha stickers from stash
Prima doll stamp
Rubbermoon Art Stamp
Pretty Blooms Stamp Set by Scrappy Cat
Markers
Chalk
Acrylic Paint:Lemon Yellow, Deep Yellow, Medium Yellow, Violet, Portrait Pink, Leaf Green, Dark Green, Limonaide
Orbit Olive Gold by Lindy's Stamp Gang
Bling from stash

Sunday, March 29, 2015

Gina's Deisgns DT Project - Inspire Planner


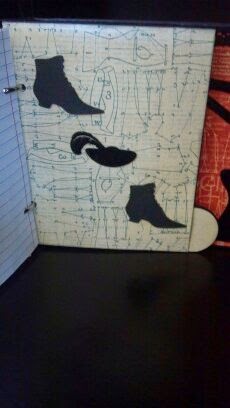
The pictures below are how I decorated my journal. The paper is Graphic 45 - Couture.  The frame and the word inspire were both embossed. I then cut out a black oval to go behind the frame and attache the word to it. Pop dots were used to attach it to the book.
On the side I used one of Gina's dangle and created this fun charm.
The corset was painted black and the "lace" painted white.

The sewing machine is embossed with black and silver.
The next three pictures are the tabbed pages. The chipboard was painted black.
The hanger and the dressform were embossed with black. I attached these two piece as well as the corset towards the edge of the covers so I would still have the flat surface for writing.

Gina's Designs Products Used:

Sunday, March 22, 2015

Gina's Designs DT Project - "Bee..." Art Journal Page

Hello fellow crafters. Today I want to share with you my very first art journal page! I had so much fun making this. I learned two things while doing this: there is no wrong way to create and I love making a mess!
I started with page with a coat of gesso. From there, I used all the paint colors listed below to create the background. I just kept adding layers. If I didn't like how the color turned out, I applied more gesso to that area and started again. Once dried, I sprayed Lindy's at the top of the page and let it run down. While the page was still wet I took a paper towel and pressed to absorb the excess. In some places, it lifted the color which added depth. After that I used stamps in select spots across the page.  The brown spots were created by watering down brown paint and using a fan brush to splatter it across the page. The edges of page were inked with Vintage Photo, Walnut Stain and Black Soot.
The honeycomb was first cut a part and then painted brown. Once it was attached to the page, I used my finger to apply gesso in random spots. The bees were first painted yellow and when that was dry, I used black gesso for the markings. The Prima stamp was used on the wings.
 
There were several hexagons pieces that I was able to pop from the honeycomb to use. After the yellow paint was dry, I used some rub-on alpha's and edged the tiles with Walnut Stain and Black Soot.
For the words, I rubbed the letters onto white card stock and then used Walnut Stain along the edges. Once they were adhered to the page, I used a charcoal pencil to create the dark frame around each of them. For a softer look, I used my finger to smudge the lines.
 Gina's Designs Products Used

Other Products Used:
Paint: Daler Rowney: Medium Yellow, Cream, Yellow Ochre, Lemon Yellow, Brilliant Red, Orange
Folk Art: Daffodil Yellow
Liquitex: Burnt Umber
Gesso
Rub-on Alpha Stamps from my stash
Stamps: RubberMoon - Mixed media 
Prima - #96081
White cardstock
Ink: Tim Holtz Distressed: Spiced Marmalade, Mustard Seed, Vintage Photo, Walnut Stain, Black Soot
Lindy's Stamp Gang - Summer Lovin' Sun
Black Charcoal


Thank you to all the wonderful artists/crafters that shared their art journals on various social media forums. You have all inspired me to make the leap!


Sunday, March 15, 2015

Gina's Designs DT Project - Standard Clock

Hello fellow crafters! I have a brand new product for Gina's Designs - the Standard Clock. It will be available in the store soon! This clock has so many possibilities! I kept it simple. I plan on using it in my bedroom and haven't really decided on the decor in there yet.
The clock comes with the base, the clock face (back circle and numbers), brace to hold the clockworks and the clockworks. It all comes in separate pieces for easy altering! As always, I put a layer of gesso on all the chipboard pieces. The paper I used was Paris & Co. by My Minds Eye. The numbers where embossed with Lindy's Stamp Gang. Sorry, I forgot to write down the color. The clock face numbers were attached with Scotch quick dry glue. 
The back of the face plate was textured using Gina's Texture Sheet - Swirled Hearts. When the texture paste was dry, I dusted some perfect pearls over it for color.  The brace and all the edges were painted brown.
Gina's Designs Product Used
Clock Standard (Coming Soon!!)

Sunday, March 8, 2015

Gina Designs DT Project - The Moon Sees Me Tag

Happy Sunday, folks! I have a cute tag for my Gina's Designs DT project featuring stamps by RubberMoon! When I saw the "See the Moon Words" stamp, I thought of the Celestial Shape Set from Gina's!
I started by using one of Gina's x large chipboard tag and applied gesso to it. After the gesso was dried, I used various sprays, drying between different colors. Once I achieved a color, I used the inksplat stamp
All the chipboard pieces had a layer of gesso applied to them. After that I painted the shapes with appropriate colors. On the cloud I used RubberMoon's "See the Moon Words" stamp.
Gina's Designs Products Used:

RubberMoon
mixed media inksplat -art stamp
see the moon words

Other Products Used:
Paint: Medium Yellow, Yellow Ochre, Deep Yellow, Brilliant Blue, Lamp Blue, Butter Milk
Gesso
Lindy's Stamp Gang: Danny Zuko's Denim, Whale Water Blue, Ocean Blue, Tiffany Lou Blue, Bachelor Button Blue
Ribbon from my stash
glitter

Wednesday, December 31, 2014

Gina's Designs DT Project: Happy Holiday Shadowbox

Today I have a happy holidays shadowbox for you today. I apologize for posting this after Christmas, but it was a gift!


  This element piece was made with one of Gina's doilies and a punchelement 1 inch scalloped.
 This was a Christmas pick that I took apart. I added one of Gina's snowflakes to the front of the house.

The number was custom made for me by Gina. I added metal brads on the side. It is attached to the shadowbox with pop dots.
You can see the three different techniques I used on the ornaments. After they were painted I used bling on the first, a rubber stamp on the second, and one of Gina's snowflakes that I glittered on the third.
The "Happy Holidays" was cut from one of the DCWV paper stacks I used.

I hope you have a great end to 2014! Thanks again for stopping by my blog.

Gina's Designs Products
Faux Metal Number Plates (Custom Ordered)

Other Products Used
Paint: Liquitex - Burnt Umber
Folkart - Lipstick Red, Classic Green,
Wicker White, Thicket
DecoArt - Dazzling Metallics - Luminous Gold
Paper: Bo Bunny - Silver & Gold Collection
DCWV - The Christmas Combo Stack
DCWV -  The Homemade Christmas Stack
White metal snowflake brads
Large metal snowflakes - ButterBeeScraps
Glitter - Martha Stewart
Candy cane
unmounted stamp
red pearl trim
bells
acetate
tag


Monday, December 22, 2014

Gina's Designs DT Project: "The Stockings Were Hung" Tag

Happy Monday! I have a fun Christmas tag for you today. The tag is one of the three tags form the Chipboard Decorative Tags X Large set. To give the wall a bricked look, I stenciled the tag with the Texture Sheet - Brick Wall  using several of distressed inks. I cut a small section from the bottom of tag and made a made a box which I attached to the back of the tag. The next time I come across a small branch, I will have to gather it for logs!
For the stockings, I painted them red, used ink on the edges and a cotton ball for the "fur" look. The middle stocking is stamped with a snowflake stamp.

Gina's Designs Products Used 

Other Products Used
Ink: Tim Holtz Distressed Ink - Black Soot, Fire Red,Vintage Photo, Frayed Burlap, Tea Dye
Ribbon from stash
Buttons from stash
Sticker from stash
Cardstock: brown & black colors
Yarn: From stash

Merry Christmas!

Wednesday, November 26, 2014

Gina's Designs - GDT Project: Christmas Cards

 Can you believe we are less than a month away until Christmas?? I have two cards that I made using some of the chipboard pieces that Gina has in her store.
 The first card features one of the snowflakes from the Snowflake Shape Set. I applied a coat of gesso before covering it in glitter. I attached it to the card using pop dots.

The next card is an easel card. I used the Punchelements - 1" Scalloped to make the elements that will keep the card in the upright position.

Thanks for stopping by the blog today! Make sure you check out the store for other great things you can use to make cards with.

Gina's Designs Products

Other Products Used
Paper: K&Company and my stash
Bling Snowflakes: Jolee's boutique: Snowflake Repeats
Ribbon: Stash

Wednesday, October 29, 2014

Gina's Designs GDT Project Featuring Craftsupplies1!

Hello! Today I have a fall wall hanging. This project also features some of the great products from Craftsupplies1!
 
I started with one of the tags form the tag set super x. After painting the tag, I covered it with burlap from Craftsupplies1.  The fall dove tail banner, leaves and the rakes are from Gina's Designs Fall Banner Kit. All of the flowers are from Craftsupplies1.
Thanks for stopping by Gina's blog today! 

Gina's Design's Products Used

Craftsupplies1
Please visit either the Zibbet store or the Etsy store!

Thursday, October 9, 2014

Gina's Designs GDT Project: BOO!!!

Hello everyone! I have this fun Boo Wall Decor from Gina's Designs. I really enjoyed making this. I got to go from this,
to this!

 I have it hanging on my front door. I need need to use some double sided tape to keep in place since the "corn stalks" became a little heavy.
The corn stalks were made by cutting twisted paper into strips. I used several distressed inks to color it: Vintage Photo, Walnut Stain, Mustard Seed, Scattered Straw, Dried Marigold, Spiced Marmalade, and Distressed Stain Wild Honey.

The ghosts, haunted house and candy were all fussy cut from a paper collection by Debbie Mumm. The ghosts were edged in Black Soot and the other pieces were edged in Walnut Stain.
I didn't have any web material so I had to improvise and used some poly batting - I kept pulling it apart until I got the look I wanted.
Thanks for stopping by my blog. Make sure you take a look at Gina's store for more fun Halloween and Fall items!

Gina's Designs Products
Boo Wall Decor

Other Products Used
Paper: it was a colection by Debbie Mumm
Tim Holtz Distressed Ink: Vintage Photo, Walnut Stain, Mustard Seed, Scattered Straw, Dried Marigold, Spiced Marmalade, Black Soot
Tim Holtz Distressed Stain: Wild Honey, Peeled Paint
Paint: Americana - Lamp Black
Folk Art - Pure Orange, Thicket
Daler Rowney - Orange
Gelly Roll Pen - Metallic
Poly-Batting