Tuesday, March 31, 2015

Gina's Designs DT Project - Art Journal Page

 WOW! March 31. Where did this month go? I hope this post finds you all well and ready for some wonderful spring (or fall for some of you) days! I know I am ready for windows to be open. Today I have another art journal page. Yes, I do believe these are my new addiction. I call this one "Bloom Where You R Planted."
For this one I took a couple of sheets out of a large dictionary that was going to hit the trash.  I cut the pages into strips of different sizes and adhered them to the page with a glue/water mix. Gesso was lightly brushed over the top and allowed to dry before I played around with watercolors. The Prima doll was stamped directly to the page and was colored in with watercolor crayons, paint and marker. Instead of legs, I gave her a stem.
The dragonflies were embossed with Orbit Olive Gold. I used a combination of paint, ink and marker on the flowers and planter. The letters were put on white card stock and I used ink and chalk to define them. 

Gina's Designs Items Used

Other Items Used:
Gesso
Page from a dictionary
Watered down Glue
Crayola watercolor paints
Stampin' Up watercolor crayons
Distress Inks: Bundled Sage, Broken China, Milled Lavender
Alpha stickers from stash
Prima doll stamp
Rubbermoon Art Stamp
Pretty Blooms Stamp Set by Scrappy Cat
Markers
Chalk
Acrylic Paint:Lemon Yellow, Deep Yellow, Medium Yellow, Violet, Portrait Pink, Leaf Green, Dark Green, Limonaide
Orbit Olive Gold by Lindy's Stamp Gang
Bling from stash

Sunday, March 29, 2015

Gina's Deisgns DT Project - Inspire Planner


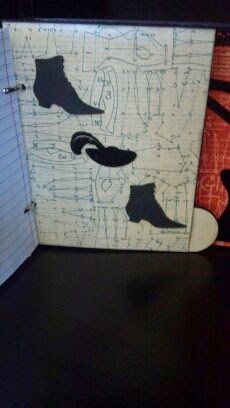
The pictures below are how I decorated my journal. The paper is Graphic 45 - Couture.  The frame and the word inspire were both embossed. I then cut out a black oval to go behind the frame and attache the word to it. Pop dots were used to attach it to the book.
On the side I used one of Gina's dangle and created this fun charm.
The corset was painted black and the "lace" painted white.

The sewing machine is embossed with black and silver.
The next three pictures are the tabbed pages. The chipboard was painted black.
The hanger and the dressform were embossed with black. I attached these two piece as well as the corset towards the edge of the covers so I would still have the flat surface for writing.

Gina's Designs Products Used:

Sunday, March 22, 2015

Gina's Designs DT Project - "Bee..." Art Journal Page

Hello fellow crafters. Today I want to share with you my very first art journal page! I had so much fun making this. I learned two things while doing this: there is no wrong way to create and I love making a mess!
I started with page with a coat of gesso. From there, I used all the paint colors listed below to create the background. I just kept adding layers. If I didn't like how the color turned out, I applied more gesso to that area and started again. Once dried, I sprayed Lindy's at the top of the page and let it run down. While the page was still wet I took a paper towel and pressed to absorb the excess. In some places, it lifted the color which added depth. After that I used stamps in select spots across the page.  The brown spots were created by watering down brown paint and using a fan brush to splatter it across the page. The edges of page were inked with Vintage Photo, Walnut Stain and Black Soot.
The honeycomb was first cut a part and then painted brown. Once it was attached to the page, I used my finger to apply gesso in random spots. The bees were first painted yellow and when that was dry, I used black gesso for the markings. The Prima stamp was used on the wings.
 
There were several hexagons pieces that I was able to pop from the honeycomb to use. After the yellow paint was dry, I used some rub-on alpha's and edged the tiles with Walnut Stain and Black Soot.
For the words, I rubbed the letters onto white card stock and then used Walnut Stain along the edges. Once they were adhered to the page, I used a charcoal pencil to create the dark frame around each of them. For a softer look, I used my finger to smudge the lines.
 Gina's Designs Products Used

Other Products Used:
Paint: Daler Rowney: Medium Yellow, Cream, Yellow Ochre, Lemon Yellow, Brilliant Red, Orange
Folk Art: Daffodil Yellow
Liquitex: Burnt Umber
Gesso
Rub-on Alpha Stamps from my stash
Stamps: RubberMoon - Mixed media 
Prima - #96081
White cardstock
Ink: Tim Holtz Distressed: Spiced Marmalade, Mustard Seed, Vintage Photo, Walnut Stain, Black Soot
Lindy's Stamp Gang - Summer Lovin' Sun
Black Charcoal


Thank you to all the wonderful artists/crafters that shared their art journals on various social media forums. You have all inspired me to make the leap!


Sunday, March 15, 2015

Gina's Designs DT Project - Standard Clock

Hello fellow crafters! I have a brand new product for Gina's Designs - the Standard Clock. It will be available in the store soon! This clock has so many possibilities! I kept it simple. I plan on using it in my bedroom and haven't really decided on the decor in there yet.
The clock comes with the base, the clock face (back circle and numbers), brace to hold the clockworks and the clockworks. It all comes in separate pieces for easy altering! As always, I put a layer of gesso on all the chipboard pieces. The paper I used was Paris & Co. by My Minds Eye. The numbers where embossed with Lindy's Stamp Gang. Sorry, I forgot to write down the color. The clock face numbers were attached with Scotch quick dry glue. 
The back of the face plate was textured using Gina's Texture Sheet - Swirled Hearts. When the texture paste was dry, I dusted some perfect pearls over it for color.  The brace and all the edges were painted brown.
Gina's Designs Product Used
Clock Standard (Coming Soon!!)

Sunday, March 8, 2015

Gina Designs DT Project - The Moon Sees Me Tag

Happy Sunday, folks! I have a cute tag for my Gina's Designs DT project featuring stamps by RubberMoon! When I saw the "See the Moon Words" stamp, I thought of the Celestial Shape Set from Gina's!
I started by using one of Gina's x large chipboard tag and applied gesso to it. After the gesso was dried, I used various sprays, drying between different colors. Once I achieved a color, I used the inksplat stamp
All the chipboard pieces had a layer of gesso applied to them. After that I painted the shapes with appropriate colors. On the cloud I used RubberMoon's "See the Moon Words" stamp.
Gina's Designs Products Used:

RubberMoon
mixed media inksplat -art stamp
see the moon words

Other Products Used:
Paint: Medium Yellow, Yellow Ochre, Deep Yellow, Brilliant Blue, Lamp Blue, Butter Milk
Gesso
Lindy's Stamp Gang: Danny Zuko's Denim, Whale Water Blue, Ocean Blue, Tiffany Lou Blue, Bachelor Button Blue
Ribbon from my stash
glitter