Wednesday, January 29, 2014

Gina's Designs DT Project: Dog Bone Mini Album


Hello everyone! Today I have or you one of Gina's Dog Bone Mini Albums featuring my dog, Molly. The album contains six bone shapes to use for the covers and pages

The first thing I did was gesso all the bones.  After that I covered each of the bones with paper from The Pets Stack by DCWV and inked all the edges.On the cover, I embossed a chipboard frame with Lindy's  Madonna Rube Blue Gold. I put two metal pieces from ButterBeeScraps on both sides of the frame. The  metal letters spelling out "Molly" were from my stash. The letters were on top of paperclips and I easily broke them off and attached them to the frame with E-6000. The picture in the frame was from the first day home.
I attached the album with a ring and tied some different ribbons on it.
Here are the first two pages of the book.
The "sweet" is a cutout from the paper collection and is attached to one of the dog bone tags that comes with the album. The is a total of three bone tags and three circle dog tags that come with the album.
The three pictures are framed with paper from the collection. The paper mats are inked and then attached to the album with pop up squares. The paw print was cut out from the paper collection.
Here are pages three and four!
On page three I used the three-frame film strip that comes in the "Say Cheese Shapes Set". I embossed it with black and attached photos of her hanging with her friends - playing ball with Dakota,  "grilling" with Phoenix, and chilling with Hershey!


 This is page five and six showing the two things she loves best; her tennis balls and napping on the couch!
I once again inked all the photo mats and included a journal spot about her obsession with tennis balls! These are the only thing she will play with. Molly has about seven balls and each one is for different moods - chewing, outside play, inside play,  nap time, or even guarding them while she eats!
Okay, I promise the page is not slanted! I snapped pictures of it standing up. Here is my spoiled dog claiming the couch!
Here we have pages seven and eight. The Polaroid frame is from the "Say Cheese Shapes Set".
Her first nap on the kitchen floor on her first day home: 6-22-2011! Yes, I know most people bring home puppies. My puppy just happened to be almost 10 years old!
The "fun" is from the paper collection and placed inside one of the embossed miniature bookplates.
Pages nine and ten complete the book.


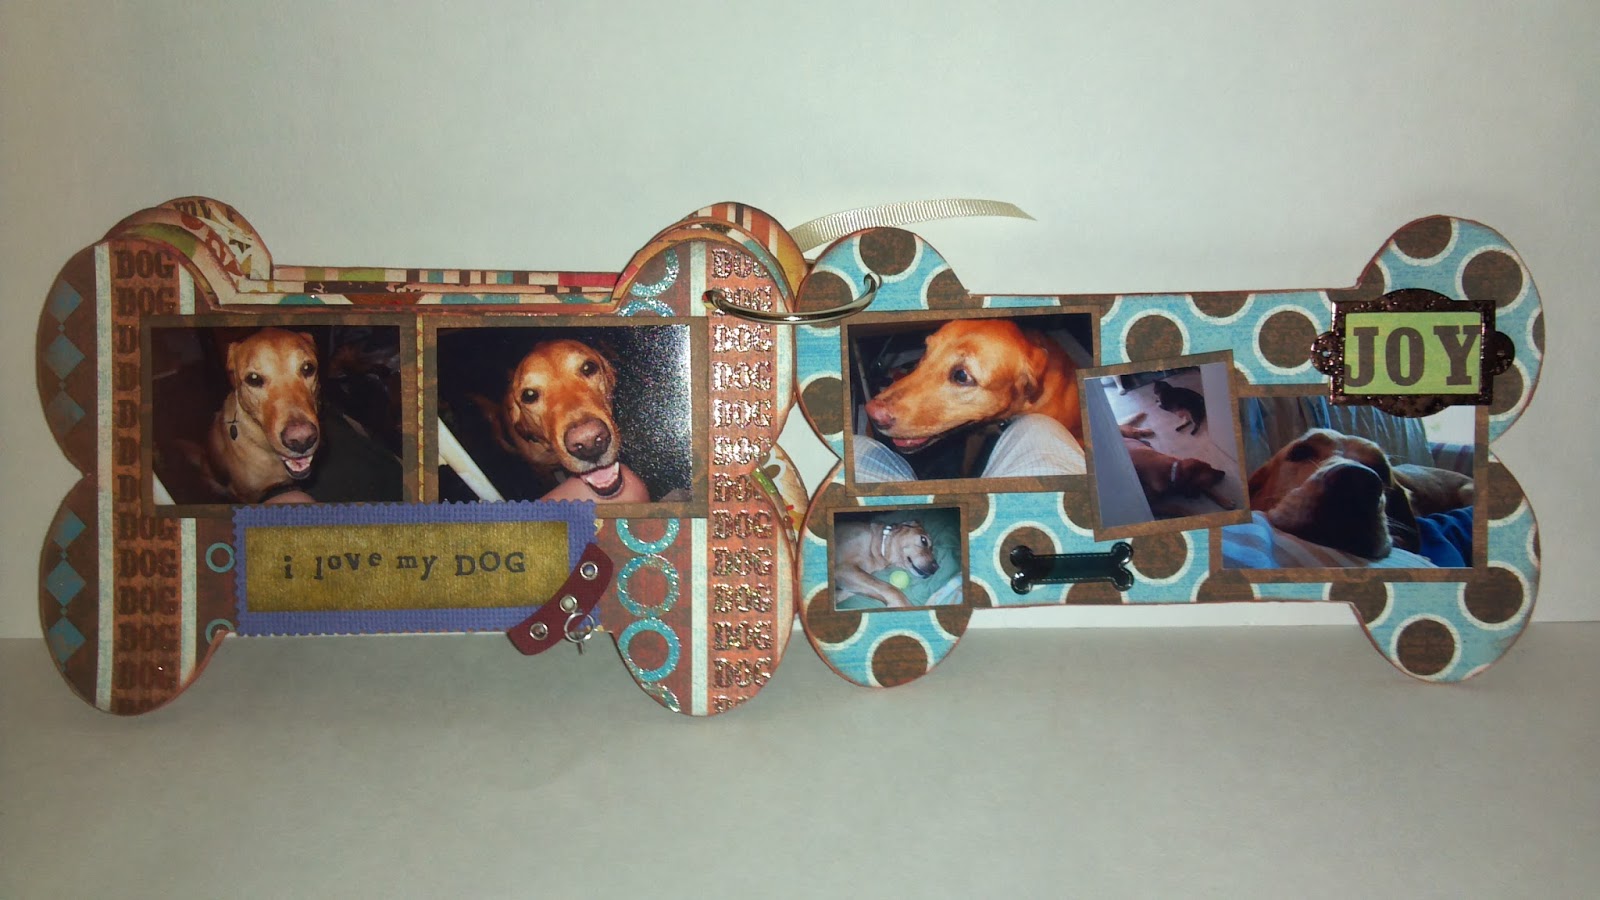
. I used another miniature bookplate and the word "joy" on page ten.
The back cover is just plain and I used the same paper as I have on the cover. 

There you have it! I wanted a simple book to reflect how she is - simple! She is not high maintenance and is such a good dog! She has been visiting grandma the last few months and I can't wait to go pick her up!
 Thanks for stopping by my blog today! I have all the links to Gina's products below plus a list of the other products used.

Gina's Designs

Other Products Used
Bling: Me & My Big Ideas
Metal Filigree: ButterBeeScraps
Embossing Powder: Lindy's: Madonna Rube Blue Gold, Midnight Bronze
Metal Letters: from stash
Paper: DCWV - the Pets Stack
Stickers: Elevations: Doggy Elevations
Jolee's Boutique: Spoiled
Life's Little Occasions: Pet Firsts Dog
EK Sucess: Epoxy Dog Phrase
Glue: E-6000, Aleene's Tacky Glue, ATG
Ink: Tim Holtz-Walnut Stain, Color Box - Brown, Stazon - Black
Ribbon: Stash

Saturday, January 25, 2014

Gina's Designs DT Project - New Marker Holder

Happy Saturday!!! What I have created for you today is this marker holder using Gina's
desk organizer 1!

Yes, I did alter a letter holder not too long ago for this purpose but the slots were not big enough to hold all my markers in one box. This worked out great. I have approximately 85 markers in the holder and as you can see, I have room for plenty more! Gina also has an incredible marker cabinet that stores 165 markers. Click HERE to check that out.

After the box was assembled, I applied gesso and then a custom paint. The majority of the box is covered with DCWV: Linen and Lace. The front panel is The Paper Studio:Kellerkurtz & Company. Each piece of paper was distressed and then inked with Walnut Stain


On the front panel, I used one of Gina's Stackable Labels Shape Set. The perfect fit for that spot! I inked both of the pieces and applied clear embossing powder over the top of them. The metal band is one of Tim Holtz's word bands which I attached to the stackable with white organza ribbon.

The unit comes with these two great drawers! A perfect place to store extra marker nibs or crayons for you or your kids to use! The front of the drawers have metal drawer pull brads from ButterBeeScraps.
 
This unit would also be great for colored pencils, paintbrushes, gel pens and of course you could use it to organize your bills (but where is the fun in that!?).

I have the links to Gina's store for the products I used down below. There is also a list of the other products used on this unit as well.

Thanks for stopping by today! Stay warm - it is a cold one today!

Gina's Designs
 
Other Products
Paper: DCWV and The Paper Studio
Metal: Tim Holtz and ButterBeeScraps
Ink: Tim Holtz - Walnut Stain, Dusty Concord and Color Box -Dune
Glue: Aleene's Tacky Glue
Organza Ribbon
Paint: Folk Art: Thicket and Craft Essentials: White
Gesso: Daler Rowney
Distress Tool: Tim Holtz


Saturday, January 18, 2014

Gina's Designs DT Project: Valentine's Day Cards

Happy Saturday! I know I am thrilled the weekend is here! For my DT project this week, I have created three cards using Gina's cute chipboard pieces and paper from the Robin's Nest.
 
As you can see from the above photo, Gina's pieces work great on cards! I started each of my cards using white card stock.
For this card, I layered some of the Robin's Nest paper on the card after I distressed the edges with Walnut Stain. I then used the swans and heart from the Valentine's Shape Set. I also used the "together" and "forever" from the 10 Words set. I did emboss all four of the chipboard pieces. The words were embossed with several layers of the Walnut Stain Distressing Powder.
Here you can see I used layered the card again with some of the paper from the Robin's Nest. The Valentine's Day ribbon was from my stash. I distressed some of the edges of Gina's Doilies and used a metal medallion between them. On the top, I placed an embossed "love" from the String Alongs - Hearts. The "love" is from one of Gina's new string alongs sets and I simply cut the "string" part off. Gina's chipboard pieces are so much fun to work with!
For my last card, I used one of Gina's doilies, cut in in half and sprayed it with Lindy's Stamp Gang - Rizzo's Rowdy Red. Next, I layered it behind strips of paper from the Robin's Nest. I embossed some double hearts from the Valentine's Shape Set and added some of the alpha stickers from the Robin's Nest. I then filled in each of the hearts with Glossy Accents.

Thanks for stopping by and having a look.Gina has many amazing pieces for Valentine's Day. You can view them HERE.

Have a great weekend!!

Gina's Designs

Robin's Nest

Saturday, January 11, 2014

Gina's Designs DT Project - Valentine's Day Tags Featuring the Robin's Nest.

Happy New Year! I hope everyone's 2014 is going well! For my DT project for Gina's Designs, I have created two Valentine Tags featuring Robin's Nest paper!


For the "Be Mine" tag, I used one of Gina's X large tags and covered it with the Red Glitter Paisley paper from the Robin's Nest. I embossed the "be mine" from the Word Art Romance set with red and black. I backed the "be" with Classic Roses from the Robin's Nest. The hearts and cupid are from the Cupid Shape Set. The hearts are embossed with red and white. 


Mr. Cupid was embossed and then stamped with a script stamp. One of Gina's doilies was cut in half and adhered to the side of the tag along with a metal piece and a heart. I used several pieces of white seam binding on the top.


For this tag, I covered one of the X Large tags with the "B" side of the Classic Rose paper from the Robin's Nest. I used a piece of lace and pearl strand from my stash along the side. The hearts from the Valentine Shape Set and Word Art Romance set were embossed and then backed with the Red Glitter Paisley paper. A metal corner and flower cluster complete the look!


Gina's Design Products Used:

Robin's Nest Products Used:

Other Products Used
Embossing Powder - Lindy's Stamp Gang & Ranger
Lace
Metal - ButterBeeScraps
Flowers/Spray - Craft Supplies 1, Lavish Laces
Pearl Strand
Seam Binding